| Home | Job | Pinball | Photo Album | Automotive | Press/Awards | Contact |

The PCS SceneMaster Lighting Controller

Introduction
The PCS SceneMaster Model LM4LS2 was won from Home Automator Magazine for 'Best Web Site' and was installed during the spring of 1999. This controller is capable of ramping lights on and off, and 'scenes'. This is where a single X-10 command can produce a combination of lighting levels. These light levels can be achieved with programmable ramp rates.Installation
I have a location in my home where four lighting circuits are controlled. In the past, three of these have been controlled by standard X-10 wall switches. The fourth one was a bank of fluorescents, and it was not X-10 controlled. This location controls lighting that covers a majority of the open design of the living space, and is the logical choice for the SceneMaster.I wanted the fluorescents to be controlled also, but connecting them to the TRIAC output of the SceneMaster is risky. I therefore chose to add a relay to the SceneMaster. The coil is wired to 'Load 4', and its output is connected to the unused contact on the barrier strip on the back of the SceneMaster. The relay is a four pole, double throw, and fits inside the SceneMaster. The whole package is quite tidy and self-contained. Three poles of the relay are used in parallel to share the current and to provide redundant contacts. The fourth one is left for a spare contact in case the other three fail. If that point comes I can then temporarily wire to the fourth one to get the circuit operational again, buying me some time to think up a long term solution. In addition to three poles sharing the current, I added an MOV (Metal Oxide Varistor) surge suppressor across the relay contacts.
One operational restraint is that this circuit is not allowed to be dimmed. When the 'Load 4' circuit is dimmed, the relay buzzes loudly in the transition range between bright and dark. When this occurs, the fluorescent lights (240 Watts in all) do not light. Time will tell if this is an issue.

The Control Panel for the PCS SceneMaster.
Unlike standard X-10 wall switches, the SceneMaster does not have a control pushbutton built into it. In order to have non X-10 control, one needs to purchase 'slave switches'. Since I needed about six of these at a cost of about $20 each, I realize that non X-10 control could get expensive. For that reason I investigated building the slave switches myself. Based on the user manual of the Scenemaster I speculated the following schematic could be used instead of the slave switch.

Schematic of my PCS Slave Switch.
Testing showed that this circuit does indeed work. I found that the half watt resistor could be as high as 500K, but I decided that 100K provided a good compromise between operational margin and a safe current limit. The buttons used were round and square pushbuttons from TechAmerica Inc for about $2 each. Apart from their low cost, these switches were chosen because they fit into the hole of a standard wall plate. I could then reuse the existing wall plates, which already match the decor of the home.

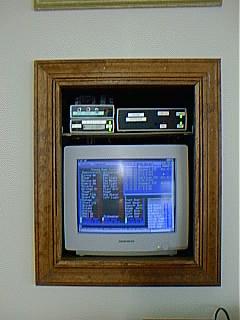
The actual unit mounts on the wall behind the control panel, which happens to be the garage of my home. The large box above the PCS unit is the alcove that houses my Home Automation Computer.

Detail of the wiring behind the control panel. Note the following:
- The modified chassis from two standard wall switches were used to hold the wall plate. Four of the eight screws on the front of the wall plate thus hold the plate to the wall, the other four are decorative.
- Caulking is used to cover exposed contacts at the back of the switches.
- The grey control cable connects the switches to the SceneMaster by exiting thru a hole drilled at the back of the junction box. This cable then leads into the garage where the SceneMaster is mounted. The loads and power to the SceneMaster is connected via another (heavy gauge) cable.
Operation
The whole system works quite well together with my Home Automation System. For example, when it is night time, and no lights downstairs are on, the Home Automation System turns on two of the four SceneMaster circuits, lighting a good portion of the bottom floor of my home. When I descend the stairs from the second floor, the lighting cascades gently on allowing my eyes to adjust to the light level. The buttons on the control panel look presentable, and have good tactile feedback.Long Term Update
- The system was installed on March 1999.
Home Automation System's Data sheet on PCS